How to Clean a Grease Trap: Four Steps
A grease trap is an essential part of commercial kitchens. It helps segregate FOGs, namely food, oil, and grease that comes out through kitchen sinks before the wastewater is let out into the drainage. When maintained properly, these tools help keep the kitchen and restaurant functioning smoothly. However, if a routine cleaning or maintenance is not done, the trap can emanate foul smells, which can then seep into the air through sewage pipes. Many companies offer grease trap cleaning service for commercial kitchens, but if you choose to do it on your own, here is how you can perform the cleaning in 4 steps.
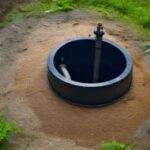
Identifying the grease trap
Before you begin cleaning your grease trap, you will first need to identify its location. Commercial grease traps are generally located outside the main building, near the walls where the kitchen dishwashers are installed. They are typically identified by covers that look similar to manhole or that of the septic tank. In the case of buildings that have a basement, grease traps may also be located within there, to protect it from the frost outside.
Steps to clean the grease trap
Once you have found the grease trap for your restaurant’s kitchen, here is how you can clean it.
# 1 – Cool water and remove lid
It is best to clean the grease trap first thing in the morning or after your restaurant has shut down for the day. If you choose to do the latter, wait till all other cleaning has been done, for you do not want the tank to be filling up while you are cleaning the grease trap. Next, wait for the water inside the tank to cool down. This helps ensure that all the water emptied from dishwashers and sinks settles to the bottom while the grease floats on top, making it easier to remove the solid waste from the tank. Slowly and gently remove the lid of the grease trap. You can do so with a crowbar or wrench, but remember to exercise caution. This is important because the lid contains gaskets, which, if damaged, may need replacement.
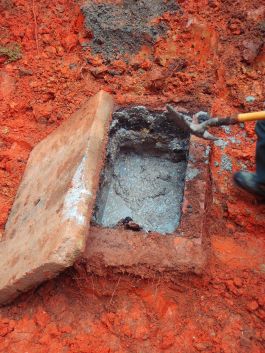
# 2 – Collect grease
The next step is to remove all the grease that has accumulated in the trap. But before you do so, stick a ruler to measure the thickness of the FOG build-up. This is necessary for reporting purposes to authorities. Once done, use a shop vacuum to suck out all the grease floating on top of the liquid. This prevents the fats from sticking on to the sides or baffles as the liquid gets removed from the tank. Next, suck out the water and food solids while also paying attention to how the shop vac is getting filled up, lest it ends up overflowing and dirtying your building with grease trap waste. Remove grease piled on the lids, sides, and baffles of the trap using a scraper. Also, remove large solidified pieces of oil and fat stuck in the trap. You could also use the shop vacuum for more thorough cleaning of the grease bits that are stuck to the trap.
# 3 – Scrub and shine
Once most of the grease has been removed or scraped off, get ready to scrub and shine the grease trap. Do so using soap, warm water, and a steel pot scrubber. Remember to thoroughly clean the sides, baffles, and other parts of the trap to eliminate odor and to ensure proper functioning. Afterward, flush the trap with clean water to remove debris and soap. Following this, pour a bucketful of clean water into the trap from the kitchen skin. If this water does not flow through freely, it may indicate a problem with the drainage pipes, which would need to be fixed by a professional plumber.
# 4 – Replace parts and dispose of waste
Once thoroughly clean, reinstall the parts of the grease trap with care. Dispose of the grease waste in a manner compliant with local laws. Most areas allow the liquid waste in the shop vacuum to be mixed with kitty litter and then disposed of in the garbage using a trash bag. Do so, if permitted, or using means as prescribed by the local authorities.